How to Integrate WP FluentForms- Help Center - SyncSpider
TABLE OF CONTENTS
- Description
- Entities
- Steps
- Step 1. Creating a Task
- Step 2. Enter Name and Description
- Step 3. Adding Credentials
- Step 4. Triggering the Webhook
Description
Help grow your business and your form builder functionality with this WP forms automation plugin .
Entities
Source | Target |
|---|---|
Send Form Submissions | NONE |
Possible Task Triggers are: upon trigger event (API call) - Form filled out
Steps
Step 1. Creating a Task
Either while Creating a Task or in the Integrations menu.
Enter the name of the integration in the search bar.

Step 2. Enter Name and Description
Enter the Name of the Integration.
You can optionally also enter a description.

Step 3. Adding Credentials
You will be prompted for the Webhook.

Step 4. Triggering the Webhook
Check the box for Capture Webhook Response and click the clipboard icon to copy the Webhook URL.

In a new tab or window login and proceed to your Modules Dashboard on the Fluent Forms Pro menu and select the Integration Modules section.

Scroll down to the Webhooks block and activate it by pulling the toggle to the green (enabled) state.

Go back to the Fluent Forms Pro menu and select All Forms.
Select a form you'd like to integrate the replies from and click Edit.

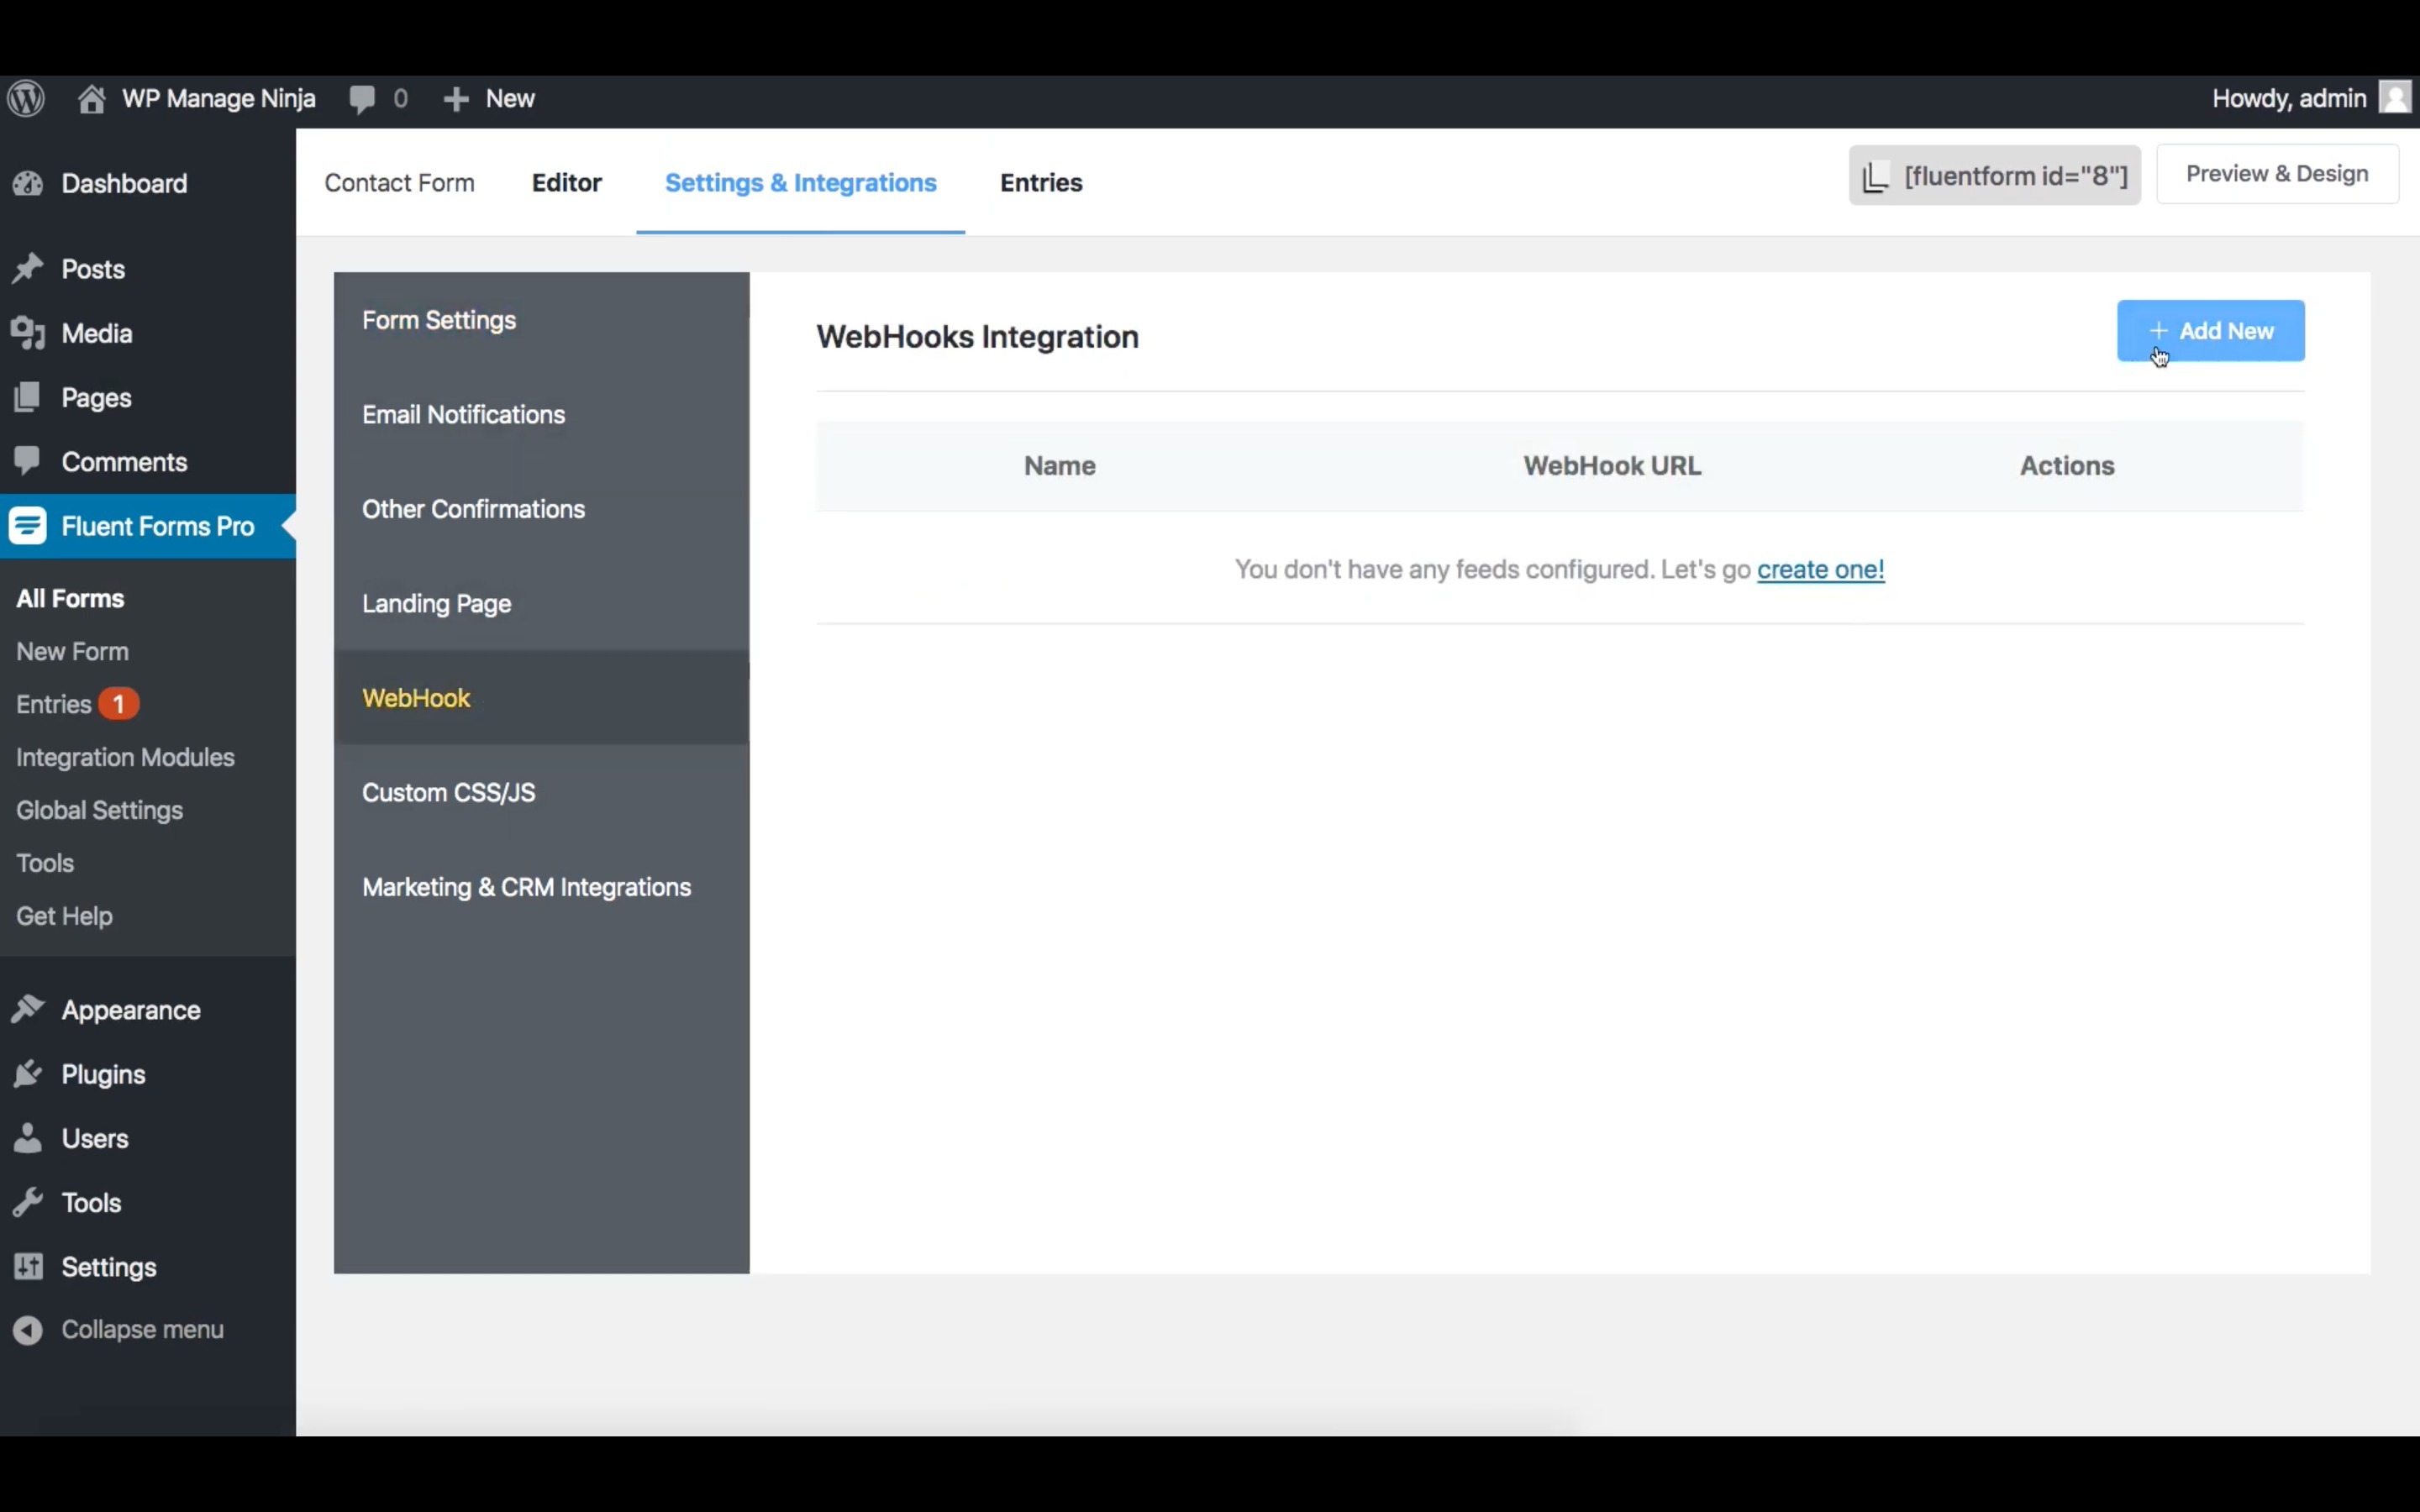
Select the Settings & Integrations tab and go to Webhook section.
Click +Add New button on the top-right.
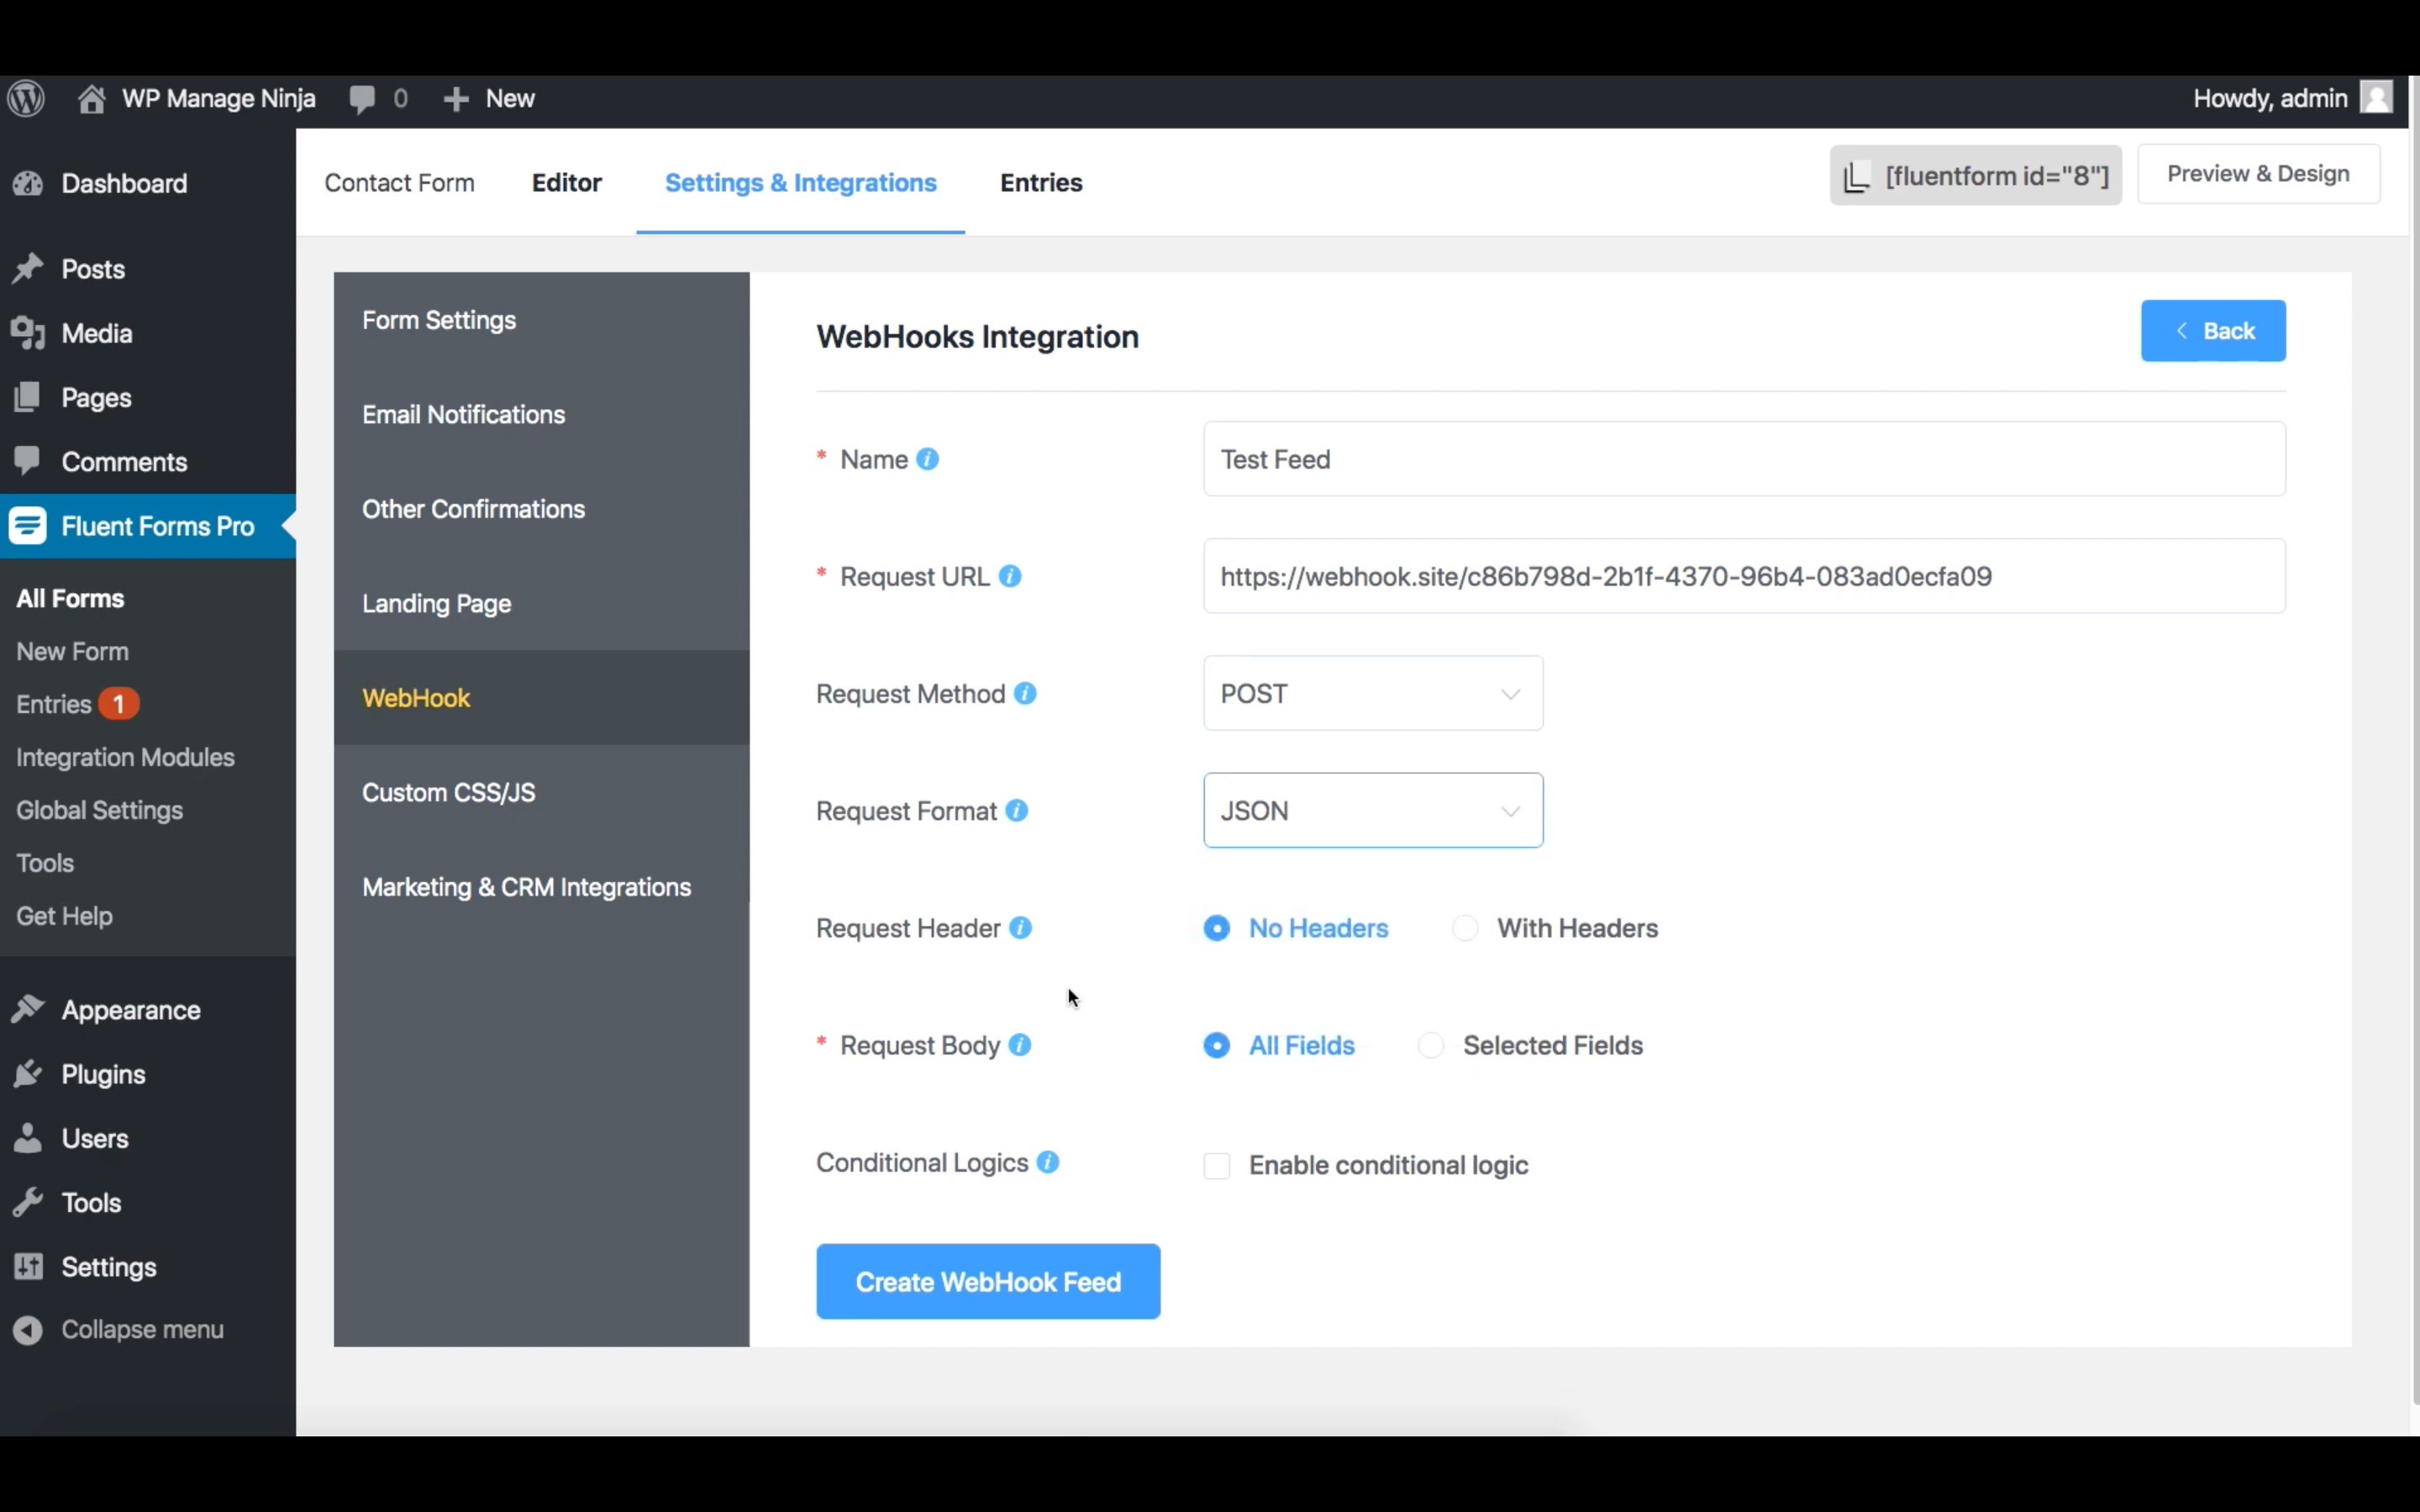
Name your integration and add Webhook URL from SyncSpider.
Set Request Method to POST and Request Format to JSON.
Enable Request Headers (select With Headers option).
See next step to configure exported fields.
Click the button on the bottom to Create WebHook Feed.
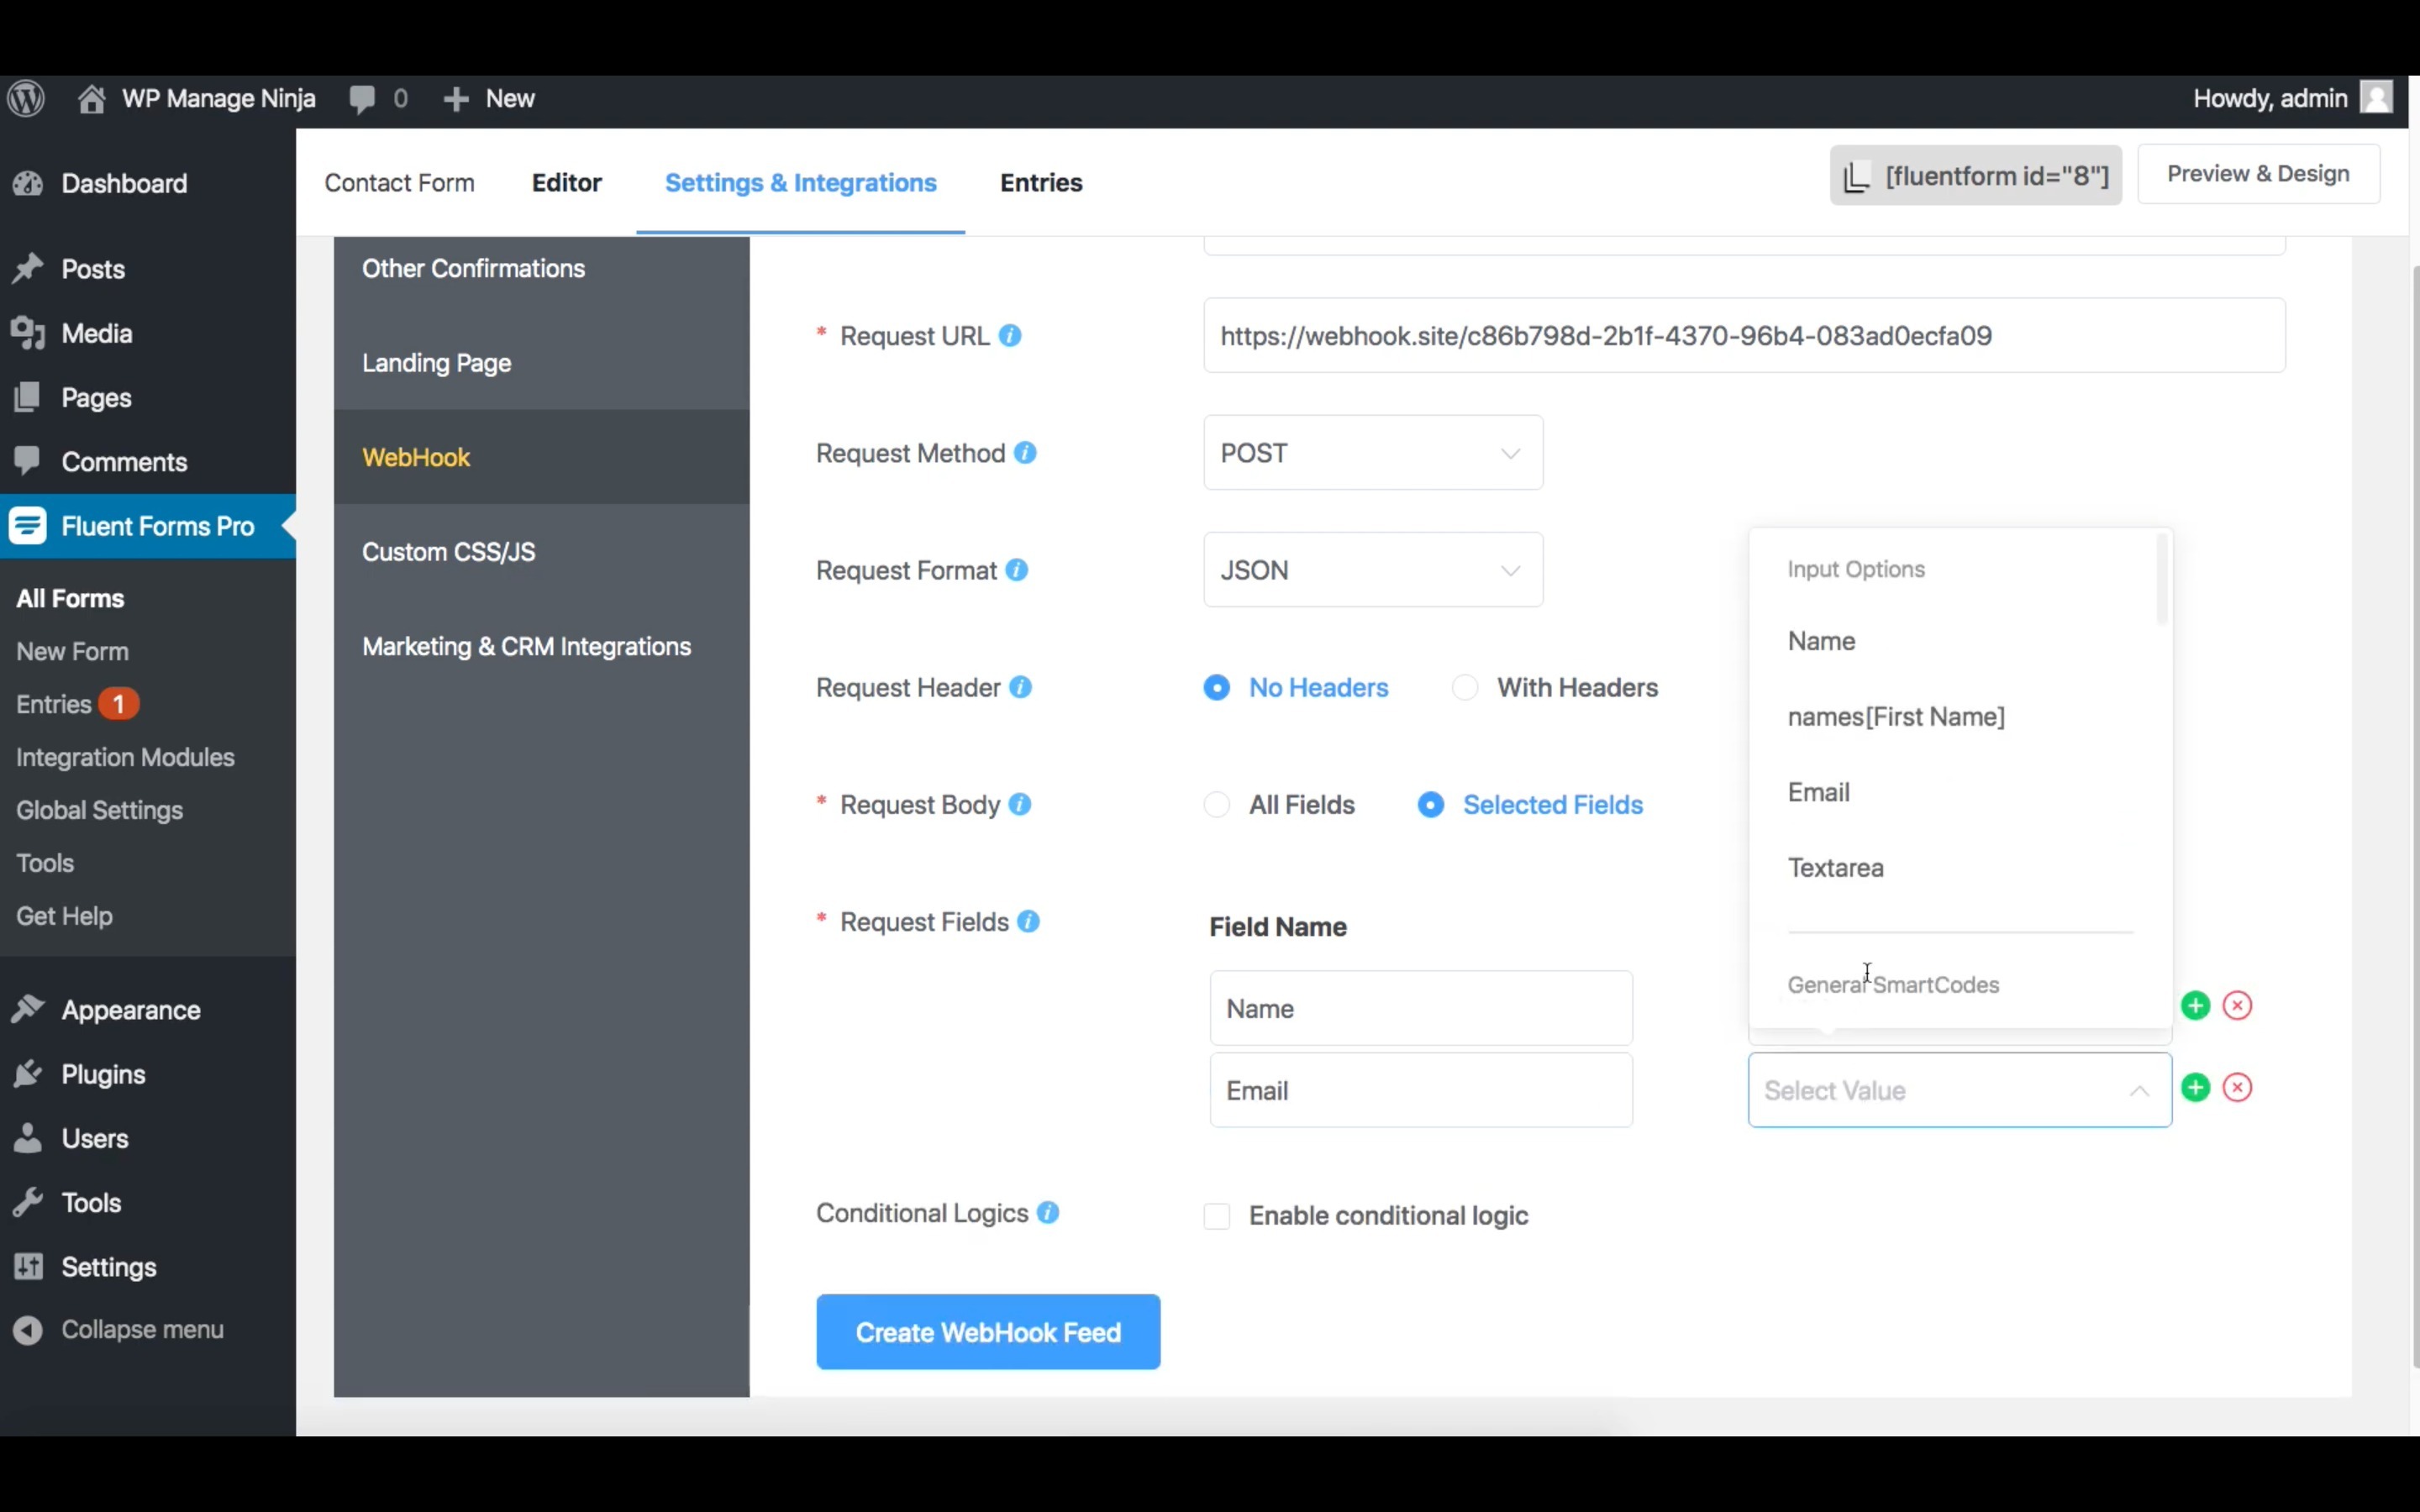
(Optional):
You can specify the fields you'd like for your data to contain if you don't need the full form reply to be exported. In this case select and name desired fields.
You can also filter your exports by using the Conditional Logics feature.
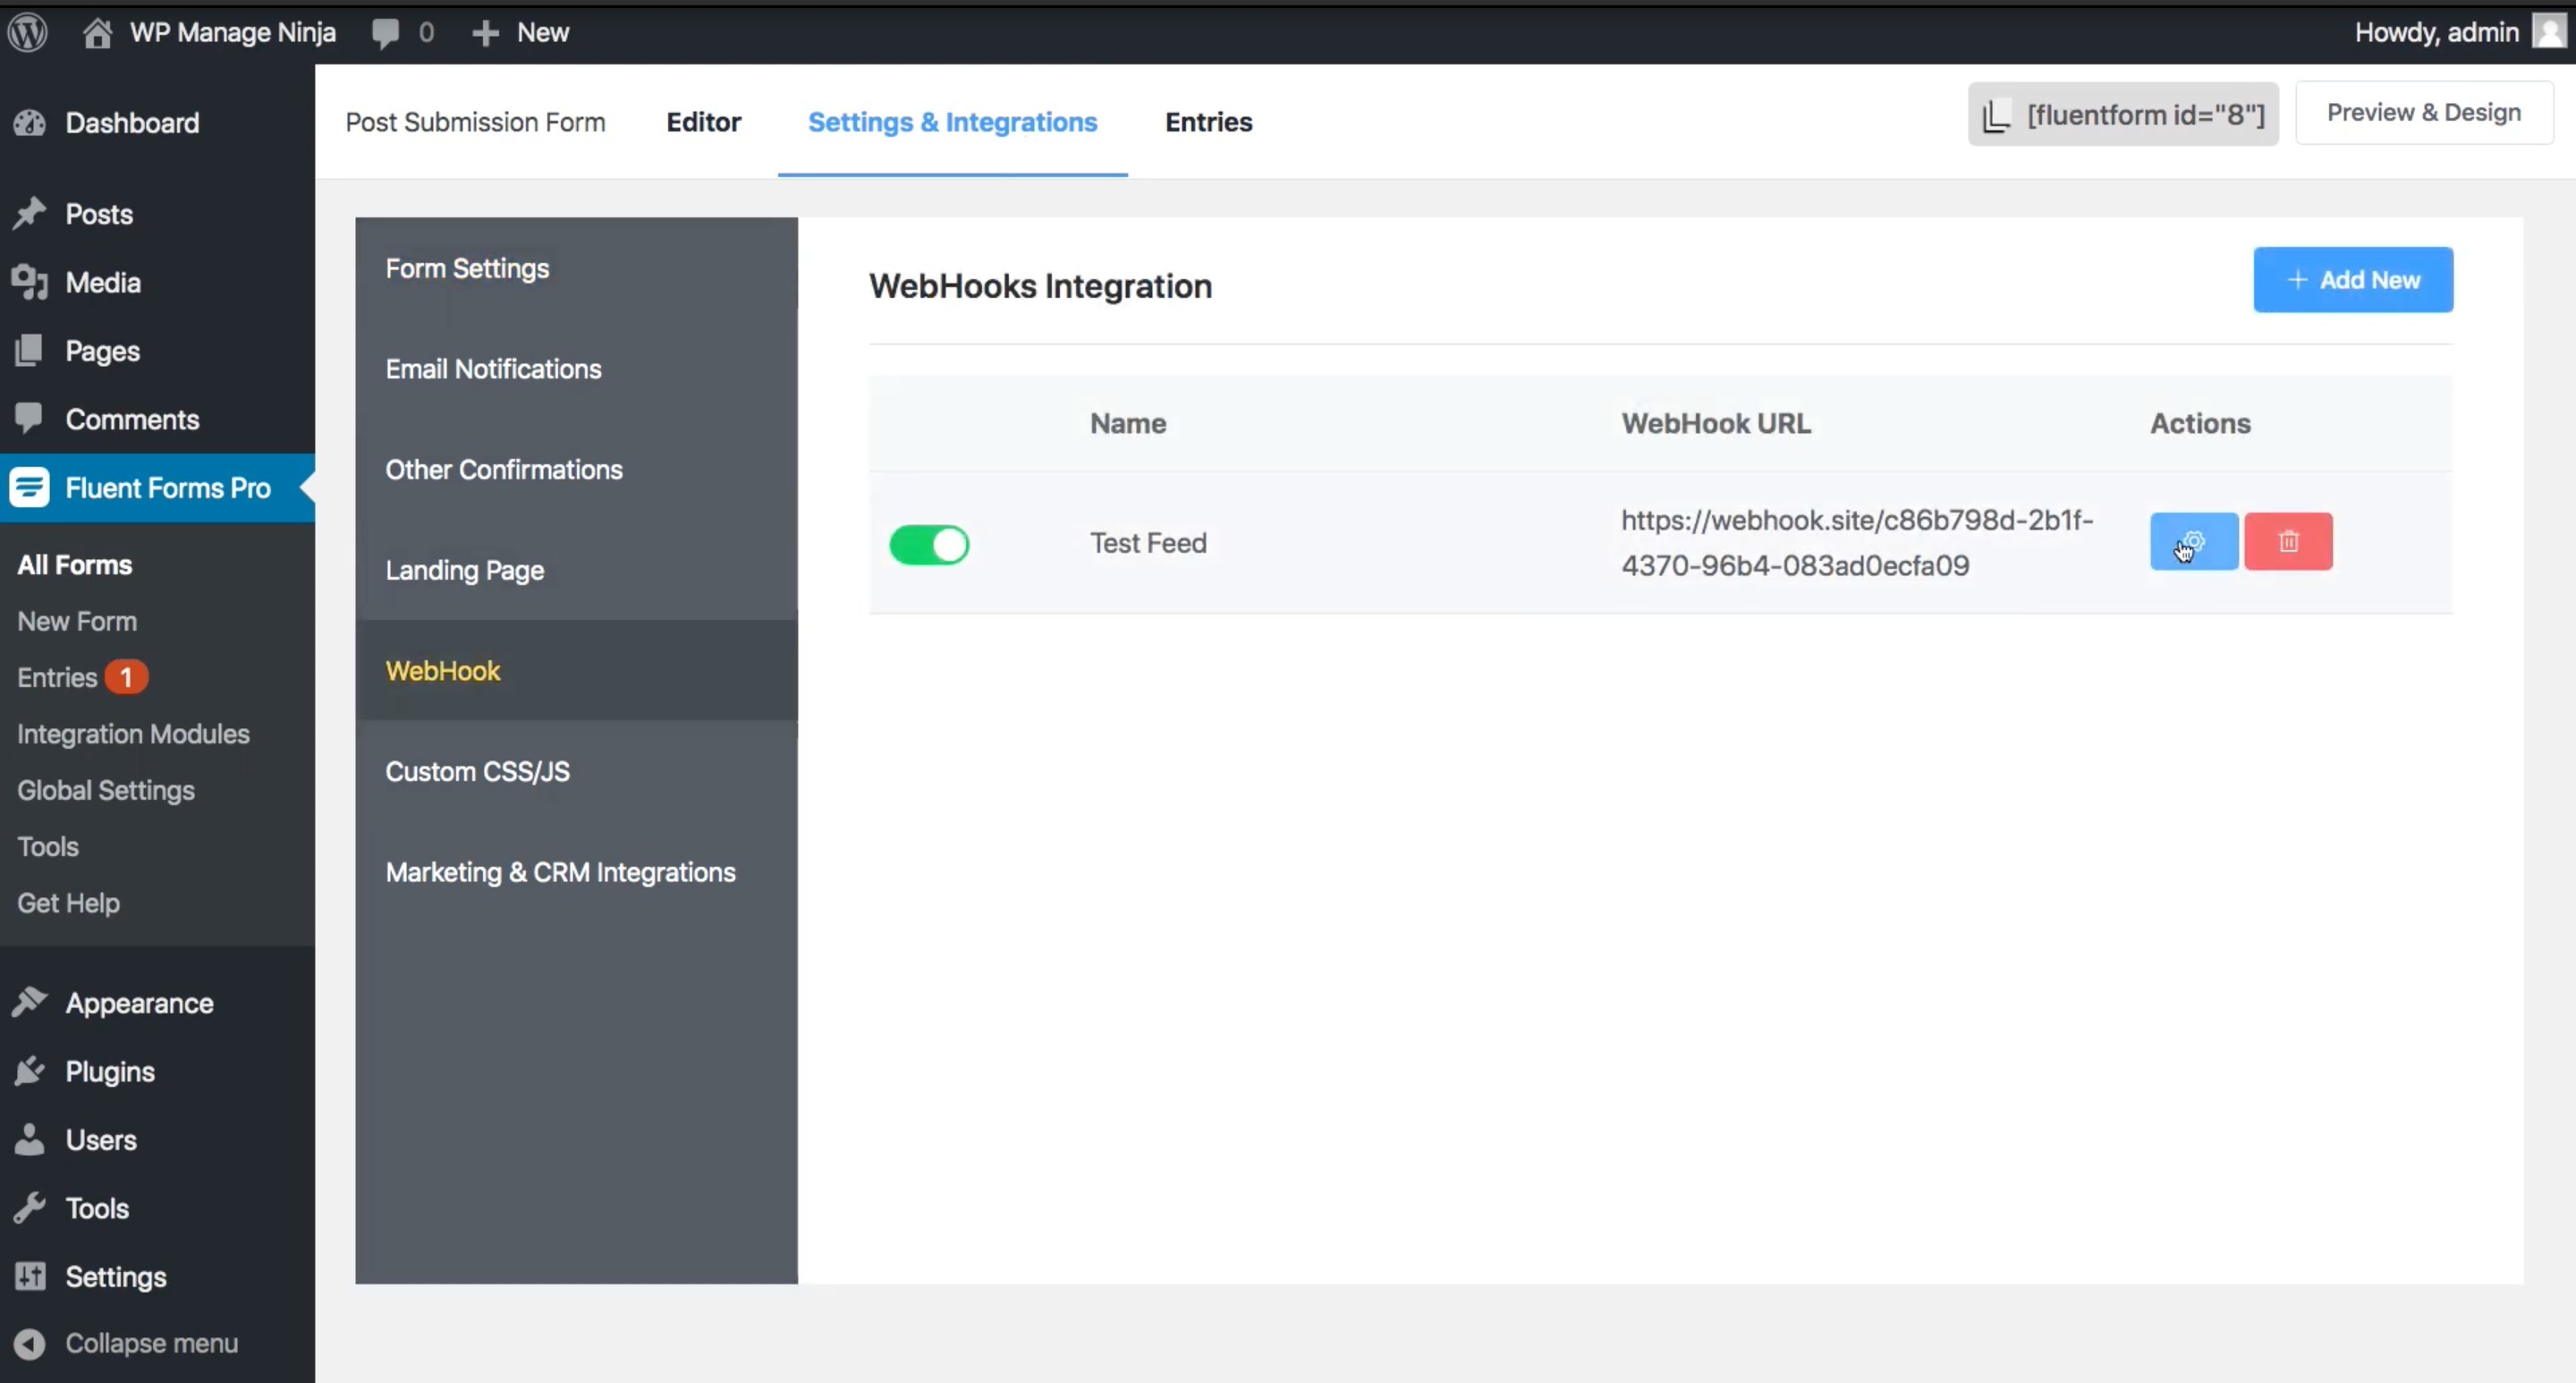
Enable your integration by switching the toggle to green.
Note: use the blue gear icon on the right if you need to edit the settings.
Make a test submission to send a Webhook Response for SyncSpider to capture.
Check by going back to the SyncSpider tab/window and verifying the response body text appearing in the setup window.
Once you confirm the response is present on SyncSpider select Finish/Save.
WP Fluent Forms is just one of the tools we support!
To check the list of the tools and features we support please click here!
If you don't see your favorite tool on our list, please take the time and send us the request here to create an integration for you or UP-vote if it's already on the list
We develop integrations based on the requests and up-votes
We hope that this covers everything. If you have any further questions or need additional clarification please reach out to us via [email protected] or our chat widget!
Updated on: 22/09/2026
Thank you!